Sick of forgetting to arm your alarm when you leave?
Ever accidentally set your alarm system off when you get back home because your forgot to disarm it?
Tired of scrambling for your code when the security company calls your phone?
Don’t worry! We’ve got you covered.
While some alarm systems have a feature to automatically arm the system based on the location of your smart phone, many don’t. The feature’s called “geofencing.” Some alarm systems support geofencing natively while others can via IFTTT integration like Scout (that we reviewed here) and iSmartAlarm.
But even if your alarm doesn’t have that feature built in, don’t sweat it. We’ll show you how to implement “improvised geofencing” to control your alarm system anyway.
Important caveat:
This will only work on Android. For those using iPhones, just keep repeating to yourself that Apple is better while you read this, and you might still believe it at the end of the article.
I KNOW you have friends that could use this tutorial. Don’t be selfish!
Getting Set up
Here’s what you’ll need:
- Android phone running 4.2+
- Tasker app (paid)
- AutoInput Tasker plugin and AutoApps manager (in-app purchases)
This part is a little trickier than you might initially think, just because it’s not obvious what you get with the free and paid versions here and how long trials last. The bottom line is, just spend a few bucks to purchase Tasker and the AutoInput plugin, and it will be worth it when you use them. Otherwise, you can get a trial of Tasker here and use the 7 day trial if AutoInput.
Setting up Improvised Geofencing for your Alarm System – Community Edition
Before we get started, we have a much more detailed version of this walk-through as a free guide for those that sign up for our email list. It will save you time and headaches beyond what we have here. Just enter your email address below to get the tutorial. You won’t be disappointed.
As a bonus, it also walks you through setting up voice control of your alarm!
Sticking with the slow and painful approach? OK, I understand you don’t trust me with your email address. I’ve been there before too, so I’ll try not to be offended.
Moving on, the idea here is to establish a location and a radius around your house. When you leave that area, your alarm will automatically be armed. When you enter that area again, your alarm system will be automatically disarmed.
Sounds great right!?! Let’s get started.
Setting up the Task to Arm the Alarm System
You have to think of the Actions required and their order just like you would be controlling your phone. For instance, first you launch the app. Then, you press the Arm button. Then, you hit the Home button (optional). We’ll be setting that up in Tasker.
Here’s the walk-through.
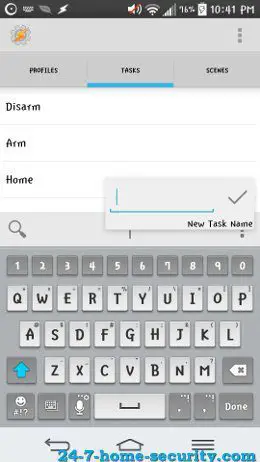
- Add a new Task to arm the system.
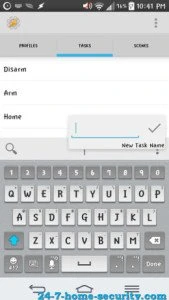
- Add an action to launch your alarm’s app.
- Add an action to press the arm button in the app.
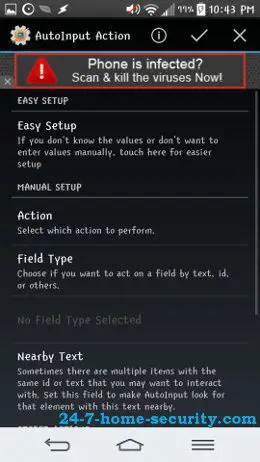
- The Action Category popup will appear, choose Plugin -> AutoInput -> Action.
- Select “Easy Setup.”
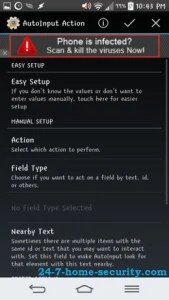
- Navigate to the app and press Select, then press the button in the app that performs the action that you want to take (such as Home, Away, Arm, Disarm, etc).
- On the notification, press Accept for the chosen button or screen location.
- Navigate back to Tasker on your app list and follow the instructions to configure the action to take on the button you just chose.
- Back on the Task Edit screen, click the ‘+’ to add an Action to go back to the Home screen.
- Select App -> Go Home
Now your Task is all set up! You can manually test the Task using the big play button at the bottom of the screen. Then, back out to the Home screen to make sure the task is saved.
Setting up a Profile to Trigger the Task
Next, you need to configure Tasker so that it knows when to run the task that you just set up to arm your system.
- Click on the ‘+’ to add a new Profile. These act like triggers for your tasks.
- Select “State” for the context of the profile (aka when the profile will be active/run).
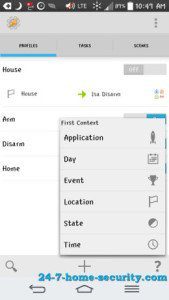
- Choose “Location” to set up arming the alarm when you leave your house.
- Navigate to your home on the map and long press to set the location.
- Go back to the main screen and associate the task you created earlier to the Profile.

Alright, you’re all set. Now, you just have to test it out and then do the opposite to disarm your system. There are other settings that you can customize to determine how often Tasker checks your location and many other options, but this should get you started. You can tweak to make improvements from here if you want.
Feeling guilty about keeping this to yourself? Share it and sleep with a clear conscience tonight!
Sound like too much trouble? Find a system that lets you do geofencing automatically with our home security system comparison page!
Listen Up!
I know that these instructions will save you a ton of time because it took me forever to find the right references to figure out how to do it in the first place. If you think you’d benefit from more detailed instructions with pictures covering each step, we’re offering a free tutorial for new subscribers to our email list. You get 1) a tutorial that’s worth its weight in gold, 2) timely access to all of our new articles and security tips, and 3) our commitment to respect your trust in us and not spam you.

Hi, I’m Jody. I graduated with honors with a Masters of Science in Computer Engineering and have over 15 years of experience working as an engineer with electronics products. I’m a lifelong learner and tinkerer and enjoy automating things around the house so I can solve bigger problems than getting out of bed to check if the garage door is closed . . . like too little sleep!
