As of January 2021, iSmartAlarm is no longer under active support.
Notice Regarding Future of Product Support:
iSmart Alarm, Inc. (“iSmartAlarm”) deeply regrets that due to the current economic climate, it will be unable to continue supporting iSmartAlarm products.
A third party, meShare Inc. (“meShare”), has graciously agreed to host iSmartAlarm’s products on the meShare network (the “Services”), for free, for a period of 12 months, starting from January 10, 2021 (the “Period”). Given the complexities of the transition, some iSmartAlarm users may experience reduced functionality with respect to their iSmartAlarm products, and some iSmartAlarm products may be incompatible with the meShare network and therefore stop working. Neither iSmartAlarm nor meShare makes any warranties or guarantees as to the compatibility or functionality of a user’s iSmartAlarm device or user experience, or to the Services in general.
To continue using your iSmartAlarm products during the Period, you will have to update your iSmartAlarm app and will need to agree to the updated Terms of Services and Privacy Notice governing the iSmartAlarm products and Period when signing into the updated iSmartAlarm App. meShare may, at its sole discretion, choose to terminate the Services during or after the Period, with or without notice.
You can check out our Best Home Security Camera Systems review for other options!
Looking for the top dog among the do it yourself alarm systems? iSmartAlarm may be your pick.
Read on to get the details of our review and how to configure your system for max security.
The Bottom Line
Not sold yet, be sure to check out our comparison of home security systems here for more information about other systems.
After a few weeks of using the iSmartAlarm and iCamera Keep system, we can say that it has a lot of potential. All of the nice-to-haves are there with the integrated camera and presence detection to really make this an intelligent system. Unfortunately, the immaturity of the system was on display a few times during our testing with app registration errors and hangups during the setup process. And, the iSmartAlarm Keep camera never had very good WiFi range. Fortunately, aside from that, the system worked as advertised. This would easily be 4 stars if you just wanted the security system without the camera. Update (3/20/15): After the announcement of IFTTT support and testing the new channel, we've bumped the rating up to 4 stars. For iSmartAlarm, 2015 is already turning out to be a productive year. Update (6/18/15): iSmartAlarm recently pushed an app update (1.6.87) and new firmware to the iCamera Keep that has resolved the WiFi connectivity issues described below. The camera is now usable, and a good value for the features. In addition, the app login process is more reliable and slightly quicker as well.
What We’ll Cover
The iSmartAlarm Review from a Browser
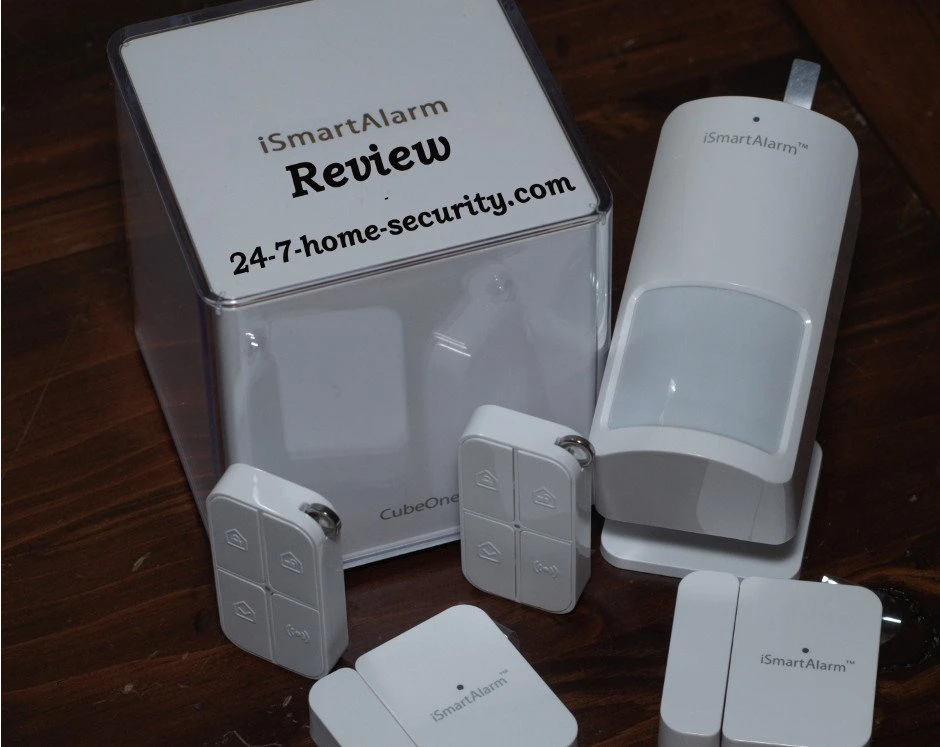
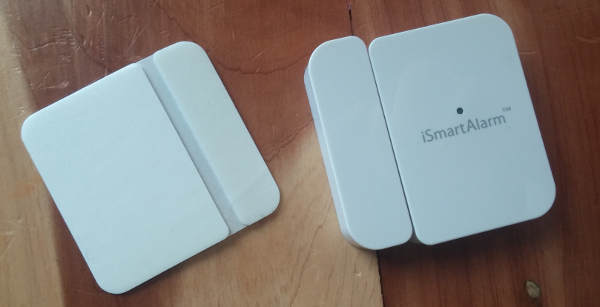
On paper, the iSmartAlarm security system and the iCamera KEEP are an attractive system. Here are some key features:- Completely DIY with no monthly fee
- Optional, integrated camera to verify a problem when an alert is sent
- All of the security sensors you need to get started monitoring your house (entry and motion)
- PLUS, some nice extras that not all of the competitors have like remotes/presence sensors to tell when family members are home
- An affordable entry point at $200 for 2 entry sensors, 1 motion sensor, 2 remote/presence indicators, and the hub.
- IFTTT integration
- External siren integration
- Recording video clips when the camera is triggered
- Z-wave compatibility
What does the iSmartAlarm system cost?
The system we're reviewing currently retails for $390 and consists of:- iSmartAlarm Preferred Package - 2 entry sensors, 1 motion sensor, 2 remotes and presence indicators, 2 window stickers, and the control unit ($200 from iSmartAlarm site or a bit less at Amazon)
- No monthly fees and no contract
- Multiple modes for armed, disarmed, home, and panic
- Customizable alarm and notification settings
- >100 dB alarm built into the hub
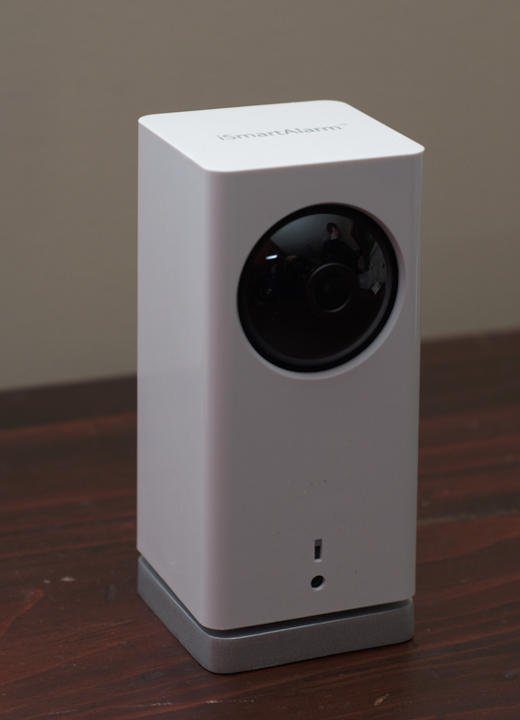
- iCamera Keep - a pan and tilt, HD, indoor camera with motion and audio sensors that works with the iSmartAlarm system or as a stand-alone WiFi camera ($150 from iSmartAlarm)
- 1280x720 resolution
- Pan and tilt
- Motion and sound detection
- Receive push notifications
- Store 10 second video clips for free (unreleased feature)
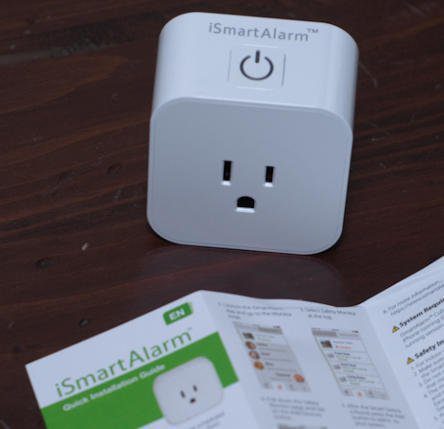
- iSmartAlarm Smart Switch - a connected outlet switch ($40 from iSmartAlarm)
- Control lamps or appliances remotely or via schedules
- Manual control for when your phone isn't nearby
First Impressions
Out of the box, the iSmartAlarm is a nice looking system. The sensors are subtle yet pleasing to look at and certainly don't look like they're 30 years old like some systems out there.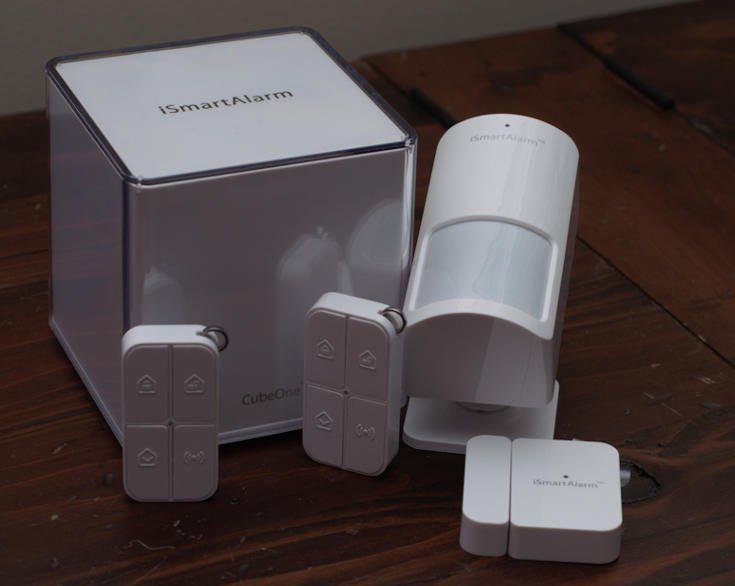
 The first thing to do is to get the app installed and set up an account. Here's where we hit our first hiccup. We got the app installed on our Android phone and quickly ran into a mysterious error code when trying to register a new account. After browsing on the troubleshooting section and forum at their site with no luck, we proceeded to a workaround. We got a reply from tech support later and learned that they don't support Android tablets at this time.
 We got a quick acknowledgement (2 hours) that they were looking into the issue. Meanwhile the next day, we tried again and were able to register without any errors.
Hmm, it seems there are a few kinks to work out! But, I don't mind an extended installation process (waiting on support) as long as the system works when it's set up.
We got a quick acknowledgement (2 hours) that they were looking into the issue. Meanwhile the next day, we tried again and were able to register without any errors.
Hmm, it seems there are a few kinks to work out! But, I don't mind an extended installation process (waiting on support) as long as the system works when it's set up.
Setting up the iSmartAlarm Security System
Once the registration was complete, the app looks for the hub and initiates a firmware update. We hung out waiting for the progress bar to do something for about 10 minutes before I decided to restart the app. Once I did, the app found the cube (now with the latest firmware) and let us proceed with adding the sensors.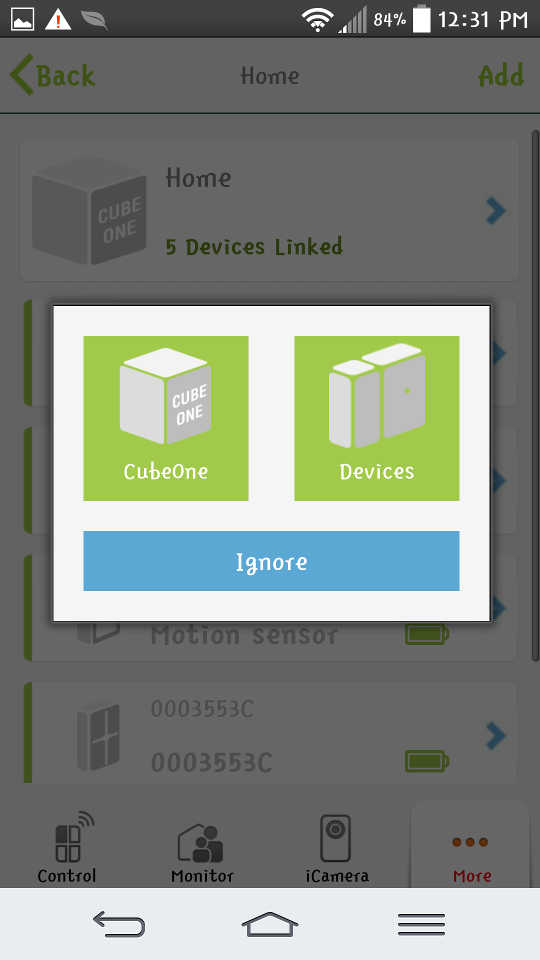 The app walks you through the process of adding devices by pulling tabs out of the battery compartment to activate all of the sensors. Once scanning was finished, the app found all of the devices. But, it promptly hung up when trying to go back one screen and had to be restarted to proceed. On the next try, all of the sensors were added with no issue, and it was just a matter of using the included double sided tape to attach the entry sensors to our doors and the motion sensor in a central location.
 All of that would have taken less than 30 minutes if everything had gone smoothly the first time.
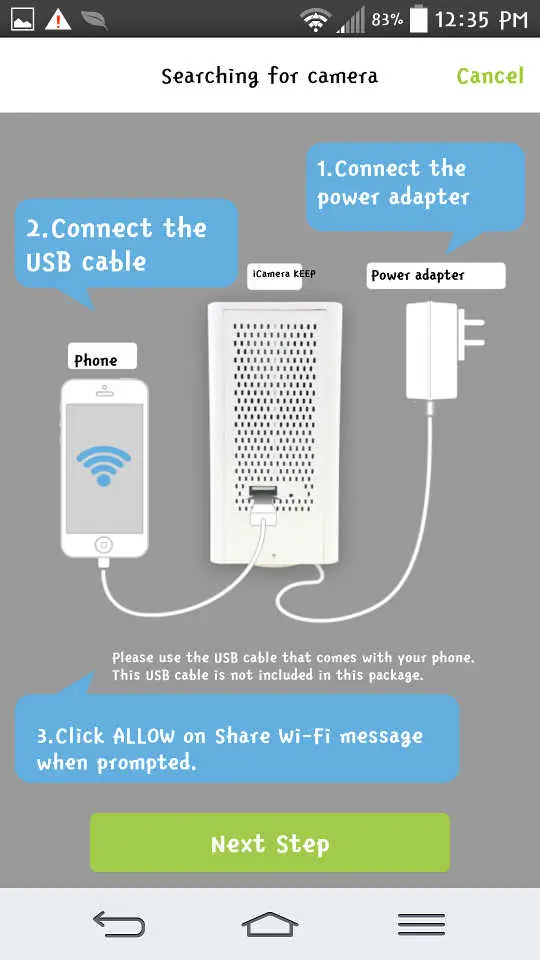
Setting up the iCamera KEEP
Now, on to the camera. Adding the iCamera KEEP was a breeze. Again, the app walks you through the process.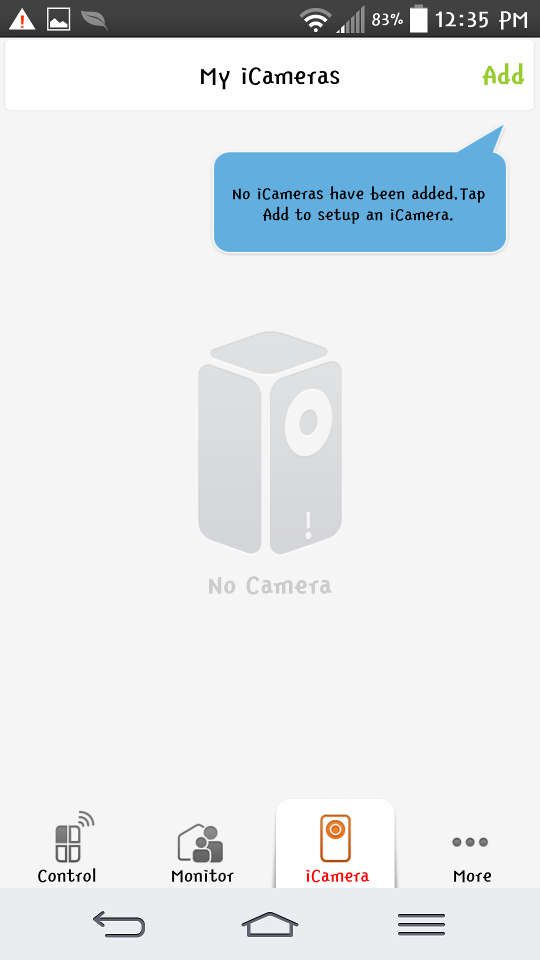 [/column][column type="one-half"]
 [/column]
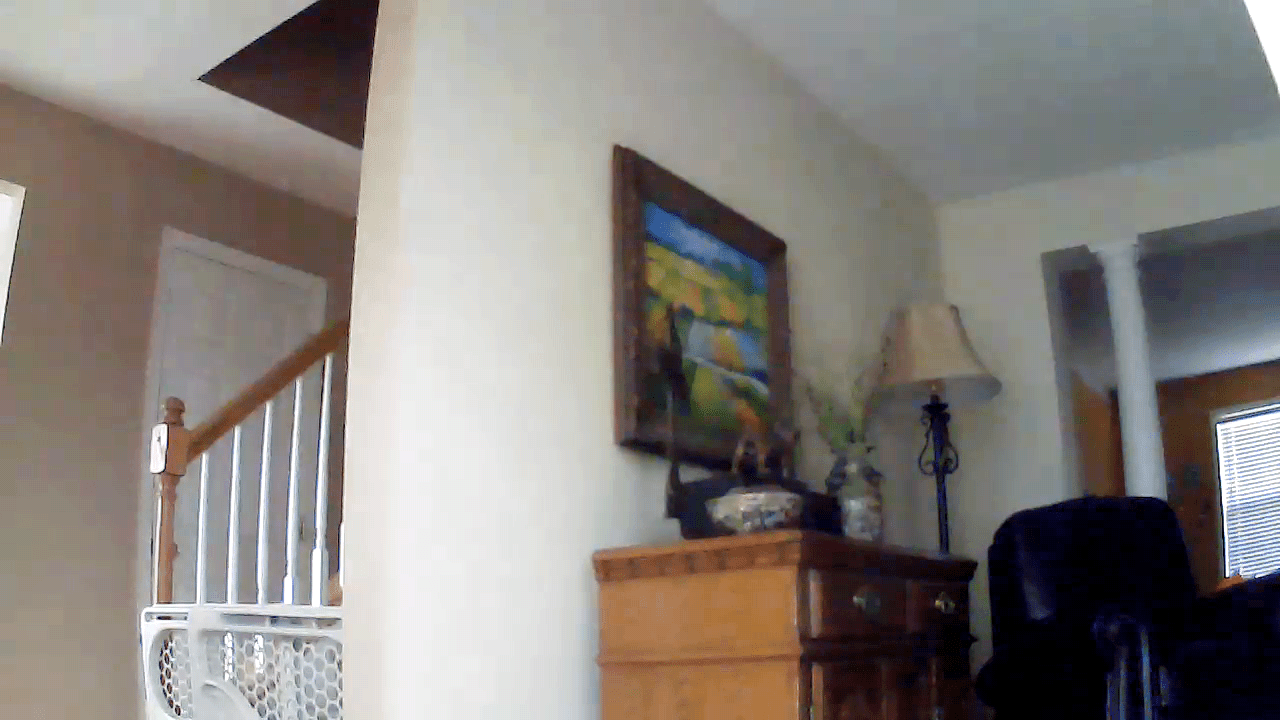
 For now, when an alarm is triggered from the camera, you won't get a video clip along with your notification. Instead, you'll have to manually pull up the camera to see what's going on. From there, you can take a snapshot just like you would on you phone's camera. We've been assured that feature is on the way, but it wasn't in place as the time of the review. Once that changes, we'll come back and add an update to this article.
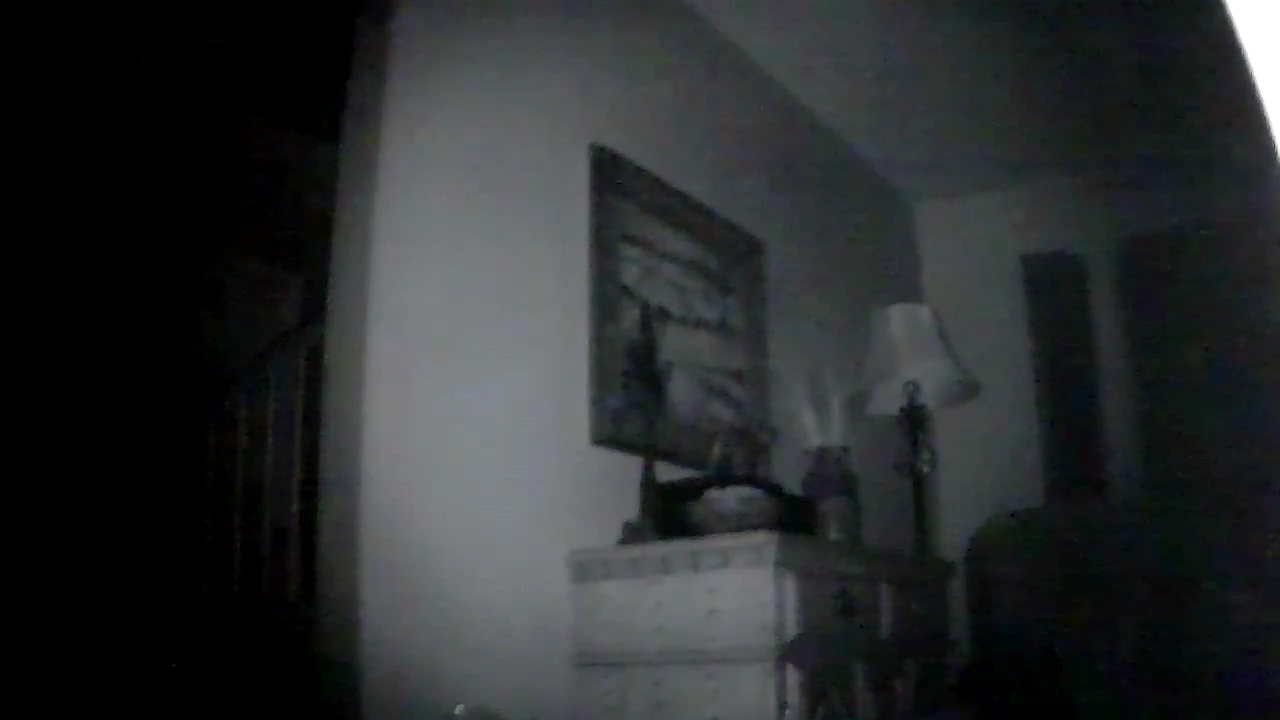
The pan and tilt features worked great, working with a simple swipe of the finger in any direction. With that ability , you can expect near 360 degree coverage around the camera from floor to ceiling.
In the camera's settings page of the app, you can control the notifications you get as well as the sensitivity of the motion and audio sensors. That way, you can account for pets that may be home even when you're away from the house.
For now, when an alarm is triggered from the camera, you won't get a video clip along with your notification. Instead, you'll have to manually pull up the camera to see what's going on. From there, you can take a snapshot just like you would on you phone's camera. We've been assured that feature is on the way, but it wasn't in place as the time of the review. Once that changes, we'll come back and add an update to this article.
The pan and tilt features worked great, working with a simple swipe of the finger in any direction. With that ability , you can expect near 360 degree coverage around the camera from floor to ceiling.
In the camera's settings page of the app, you can control the notifications you get as well as the sensitivity of the motion and audio sensors. That way, you can account for pets that may be home even when you're away from the house.
The App
The default screen of the app gives you four large tiles for Armed, Disarmed, Home, and Panic modes. They're the same options that you get on your keychain fob. The modes are pretty typical of alarm systems, where the "Home" version activates the entry sensors but disables the motion detectors while you're inside the house. You can even customize the Panic mode tile for a custom mode, if you like. You can also navigate to the device settings and rename each sensor so that it's more intuitive for your setup, e.g. "Front door", "Garage", etc. Linking another phone to the master account was also easy, you just bring up a QR code on the master phone and then scan it with the phone that you want to add. After that's all set up, the secondary phone can change alarm modes and access the camera. But, there are some limitations in changing alarm (timers, volume, etc.) and device settings (names, pictures) for the second account. After you're all set up, any trigger of the system (or every event, if you choose) will get pushed as a notification on your phone with name of the sensor that's involved.Tweaking the Setup
Out of the box, the iSmartAlarm offers the types of customizations that you would hope for in an alarm system:- Enable or disable a countdown before the alarm changes between disarmed and armed states to give you time to leave
- Disable or adjust the delay before the system is armed from 30 seconds to 5 minutes
- Disable or adjust the delay between triggering an alarm and the system going off (10 seconds to 3 minutes)
- Adjust the alarm siren volume
- Turn a door chime (even when the system is disarmed) on or off
- Send push notifications for all events, regardless of alarm state
- Create custom names sensors and controls (front door, garage, mom's remote, etc.)
- Create custom modes and activate certain sensors
Vulnerability Assessments
Now, on to the most critical question, "Will the system help you secure your home?". Here are a few thoughts you should consider.The DIY Downside
As a completely do it yourself monitoring solution, the system suffers from the same limitations as other DIY offerings:
- You (and others linked to your system) only get notifications/calls/emails when you have cell phone service
- If you’re routinely in the sticks or have an unreliable carrier, you may want a monitored system. You’ll have to assess the likelihood of missing a notification versus your risk of burglary. If a notification comes 10 minutes after a break in, you’ve likely already lost your valuables and drastically reduced the chance of the criminal being caught in the act.
- This is not a completely independent system, so you are relying on the app and the iSmartAlarm services to be reliable
- This is true for monitored and DIY alarm systems as well. But, UL listed monitoring services are certified to a particular standard of availability and process while DIY systems are not.
Many people think that having no contract and no monthly fees are worth it, given their situations. You’ll have to decide which route is best for you given the circumstances.
Lack of Crash and Smash Protection
The Problem: A burglar can disconnect or damage the cube before the alarm goes off to prevent an alarm notification. If the iSmartAlarm cube is disconnected, you WILL still receive a notification about the lack of connectivity (think minutes, not seconds), but you won’t be able to check the state of your system or your camera to verify a crime in process.
Workaround: Set the disarm delay to the minimum possible (10 seconds), disable it completely, OR disable the audible countdown so that a burglar isn’t aware of the system.
Many alarm systems (profesional and DIY) are vulnerable to so-called “crash and smash” attacks. The burglar breaks in and finds the alarm control unit and disables it before it transmits the alarm to the monitoring center.
iSmartAlarm is vulnerable as well if you don’t take care in setting up the optional settings. With the default settings, all a thief has to do is follow the beeping and unplug the iSmartAlarm cube to disable the alarm.
If you follow our recommendation, you will always get a notification when the system is triggered, and there won’t be time to disable it. After all, if you forgot to disable the alarm, you can easily dismiss the notification, delete the email, etc.. And, you are in the best position to know who would be coming into your home and determine if it’s an emergency.
Aside:
Now, in defense of security system designers, this is a tough nut to crack. One answer is to notify the central service of the initial trigger and then follow up with a “disarmed” message if one is entered. In a perfect world, that would be great. But, connectivity issues with your internet service or the monitoring services could turn that nice feature into a constant irritation because of false alarms. And, it would increase the throughput requirements of the monitoring service since they would be getting lots of new messages that would never have gone to their server before.
Underpowered Siren
Problem: The cube has a built in siren. But aside from let the burglar know there is an active alarm, it is not loud enough to draw attention from people outside your home or your neighbors (and possibly not from the other side of your house). So, if you aren’t in the house, you generally aren’t going to hear the alarm. We could barely hear it from 10 feet outside of the house (2004 construction with double pane windows).
Workaround: None at this point.
The smart switch could be used to activate an external siren, but at this point, you can’t trigger the switches based on an alarm activation. An external siren has been announced by iSmartAlarm, but there isn’t a firm release date in place for it yet.
The Future
Update: iSmartAlarm has now launched its IFTTT channel.
If a press release is a good as having a feature for you, then you have a lot to hope for from iSmartAlarm. In addition to automatic video clips, you can expect an IFTTT channel, better integration of the smart switches with the rest of the alarm system. They also have plans to release a Software Development Kit (SDK) to allow geeky types and other companies to interface with their system.
And, this is a huge one, they plan to add a USB Z-Wave stick that can be plugged into the back of the iCamera Keep in the future. That will allow you to integrate with planned water, multi-sensor, and a supplemental siren as well as a slew of 3rd party Z-wave products that are already on the market. Pair those with the planned smoke alarm, and you’ve got a really complete system.
The test will be how quickly iSmartAlarm can deliver on all of these promises, since their competitors are making many of the same moves as well. But, all in all, they seem to be a solid company. You can see how they compare to other security companies in case you still have any reservations.
Final Recommendation
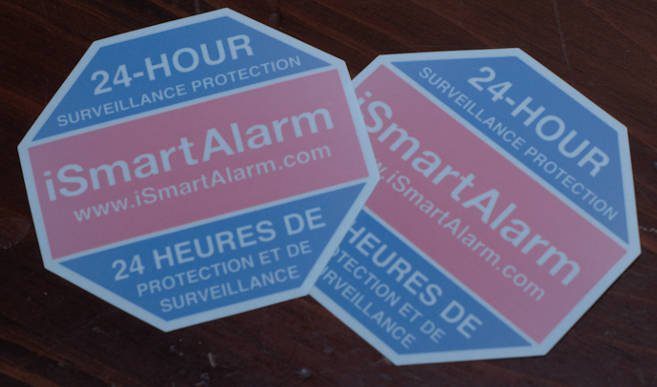
The iSmartAlarm definitely adds situational awareness to your home at a great price. With the yard sign and window stickers, you can advertise your security system and deter burglars before they even think about targeting your home. And if they do, as long as you have the system configured correctly, you will get a quick notification on your phone, a phone call, and an e-mail message. Which, if you think about it, is not a lot different than ADT calling you to ask you if there is a problem because your alarm is going off.
With these types of DIY systems, we highly recommend a camera so that you can confirm that there is a crime in progress at your home. That will generate a much higher priority response when you call the cops and get them to your home more quickly. In that respect, the new pan and tilt iCamera KEEP is integrated with the iSmartAlarm system and does just that. Unfortunately, at this point in the development (still in the pre-order stage), development and integration of the camera and the apps isn’t far enough along to rely solely on it for security purposes. In our experience during testing, the limitations in distance from your WiFi router make placing the camera in an ideal spot impossible. It wouldn’t even work reliably in the next room.
The system cost for the camera and security system is currently priced at $350. Where the iSmartAlarm security system really shines is the lack of a contract and no monthly fees. We also had a good experience with their customer support team and finding answers to questions on their support site.
It’s hard to determine pricing on the traditional security companies since they want you to have to call them so that they can pitch you on the phone. But, we can assume an upfront equipment cost of $200 for a similar system and camera from Frontpoint (the leading DIY installed/professionally monitored system), and a monthly cost of $35. Then, our lifetime cost calculator tells us the 3 year lifetime cost of the system would be $1,410. You just have to determine if the extra grand for professional monitoring is right for you.
Note: We initially completed the iSmartAlarm review on App version 1.6.6 (Android), 1.6.7 (iOS) and Firmware version 1.6.3.0
Share this Post
Thinking about getting an iSmartAlarm security system, smart switch, or iCamera KEEP? Let us know if we can answer any other questions you might have below.

Hi, I’m Jody. I graduated with honors with a Masters of Science in Computer Engineering and have over 15 years of experience working as an engineer with electronics products. I’m a lifelong learner and tinkerer and enjoy automating things around the house so I can solve bigger problems than getting out of bed to check if the garage door is closed . . . like too little sleep!
Great review. iSmart Alarm is a good off-the-shelf DIY option and I personally think it’s a good-looking system. A lot of the newer DIY companies also take a DIY monitoring approach and in my opinion a security system is incomplete if it doesn’t offer professional monitoring to back you up in your time of need. My name is Nida Aamir and I am Brand Manager at Armorax. We’ve come up with a system that is not only ease to setup and use but that also lets you take control of your safety. We offer professional monitoring for less than a cup of coffee a day but for your convenience we also give you the option of monitoring your safety yourself. Unlike the iSmart Alarm, our “silent summon” feature ensures that the system still sends a signal to our monitoring station in the event that a burglar tries to disable the system.
Thanks for stopping by Nida. We’ll look forward to taking a look at your system when it comes out.
Whatever Nida. Really, you are going to make a pitch for your alarm system on this review. How pitiful. HOw much is a cup of coffee per day. If it’s at least a buck, then that’s $30/month for monitoring. What if your cup is more a day. Cant’ state your costs by the month can you?!! The whole point of the ismartalarm is to avoid monthly fees. I can’t disagree with you more by stating you still need monitoring. Just the threat of having an alarm deters burglars and if they decide to break into your house anyhow, then an alarm going off is the biggest deterrent.
Though the reviewers stated the alarm could be louder, what they didn’t realize is that if you turn the cube over, that the alarm is at least, twice as loud! You can definitely hear it outside and that’s all it takes. Especially at my house. That alarm goes off, i will be priming my gun and any idiot willing to still enter or stay in my house, will pay the ultimate price. I love my ismartalarm. With the camera, it sets me back $350 and with a solid UPS (electrical backup), then a total of $450.
@Roger Thanks for the tip on turning the cube over. I’d actually prefer “wake up the neighbors loud” when I’m on vacation, but at least the IFTTT integration will let you turn on an external alarm with a WeMo switch to supplement the iSmartAlarm siren/cube.
Can the iCamera KEEP be mounted in an exterior application? I haven’t been able to determine if the unit is weatherproof or not. Any info is appreciated!
Nope, indoors only
So I have been playing around with the app. I think the only way to use the iCamera Keep’s sound and motion sensors while linking it to the CubeOne is to make the Custom Mode when you edit the panic button. It lets you switch those sensors on. But it won’t let you customize the regular “Arm” or “Home” modes. I don’t want to lose the panic button to get the custom button. Otherwise, the only way to use the camera’s sound and motion sensor is if they are stand alone. Do you know how sensitive the camera’s are? I live in an apartment complex and I have the camera’s pointing at the doors and windows. If someone walks by the window and their silhouette moves on the shutters, will the motion sensor catch that?
From my experience, the camera’s motion sensor is pretty similar to a standalone motion sensor, it’ll pick up movement across the average room without a problem. In my testing, it had to be a pretty loud sound to set it off. For example, talking quietly across the room did not set it off, while talking loudly did. I haven’t reassessed that in a while, but the release notes for the updates in the interim don’t indicate that is something that has been changed in software either.
As far as your windows, just about all of them are going to block the IR energy that most motion sensor use for detection, so I wouldn’t expect it to go off in that situation.
To improve the siren power some people suggest turning the cube up side down. 20 dB more they say.
Thanks for the tip. You don’t get the red light if you’re disconnected that way, but since you get a push notification anyway that isn’t absolutely needed in my book.