Want to get an idea of what you would be getting into if you choose a do it yourself (DIY) alarm system installation?
You have come to the right place.
We’ll cover tips on security system selection, installation, and monitoring to get just the system you need.
What’s a DIY Security System Anyway?
Some of you are wondering about this whole DIY thing and what exactly it means.
Well, unfortunately for you, that can vary a bit. But generally, you’ll see two categories:
- DIY Installation
- DIY Monitoring
Do it yourself security system installation means that you will be setting up the base station, setting up its connection to the internet or cellular network, and installing the sensors.
DIY alarm system monitoring just means that instead of your alarm system contacting a central monitoring station, it will instead contact you to review and respond to an alarm.
Either way, you will be taking on some responsibility for how effective your security system will be. That’s why we’re going to go into more detail on installation and monitoring so that you can understand what you’re getting into.
Deciding to DIY
- Make sure that the system you are getting has a money back guarantee. That way, if it doesn’t perform the way you expect it to once you get it, you can easily send it back and find a better fit for your situation.
- Discuss the experience of installing DIY home security systems with some friends that you trust. Then, you can apply some of the lessons that they learned to your alarm system installation.
- Check into the need for a permit for the system. Some police departments have added a permitting or fine system to offset the costs associated with checking on false alarms. So, make sure that you contact your local jurisdiction so that you can comply with whatever rules are in effect.
Want to see how much you’ll save?
Use our security system cost calculator to save time figuring out the total cost of a system.
First things first:
- Do you want to save some money by installing the system yourself?
- Do you have a smart phone and a reliable data plan that would let you monitor the house yourself, or do you want a certified, 24/7 monitoring center keeping an eye on things for you?
- Do you have money for initial equipment costs, or do you need to spread the cost out over time?
- Are your a pre-pay guy or a contract kind of gal?
Answering those questions will help you narrow down your choices considerably and make sure that perfect security system is working for you as soon as possible. That’s true whether or not it’s DIY or professionally monitored.
Selecting your DIY Alarm System
If you have a bit of cash to buy the system outright and want to avoid long-term monthly fees and contracts, you can quickly find the best security system for your needs using our comparison tool.
Here’s how to find DIY home security systems with low monthly fees:
- Open up our tool to compare home security systems.
- Use the drop down menu that says “Monitoring” to select “DIY” alarm monitoring.
- Compare features and read our reviews of systems to get a better idea of what they offer.
- Then, open another tab to review the home security sensors and home automation features of the systems you are interested in to see if they meet your needs.
Again, here’s a video showing you what to do:
For DIY monitoring, that gives you at least 11 systems from 10 manufacturers, including
- D-Link (Staples)
- Insteon
- Iris
- iSmartAlarm
- Piper
- Skylink
- SmartThings
- Vera
- Viper
- Wink
Use the Equipment Key below the table and the Minimum Kit Contents row to see what you get with your system. Then, you can get an idea of what the total cost of the system is using our calculator.
Compare Every System
Jump over to our master table and look at every system. You can set up the filters that you want and sort any cost.
Available Sensors and Home Automation Features
Looking for home automation or a certain type of sensor that you didn't see listed? We've put those together on another page so that you can quickly find what you're looking for.
Think a Camera will Do the Job?
Compare the cameras and features that are available.
Advantages
- Save money (USUALLY, use the data from our comparison tool and our cost calculator to know for sure)
- Install the system when you have time, 24/7
- Easily add new equipment in the future
- Take your system with you when you move
Disadvantages
- Experts on the phone can’t see your home
- You may be one of the 2% with truly unique installation needs
- The upfront cost for the equipment is normally higher
How many sensors do I need?
This is a loaded question, but I’ll start you on the path of answering it yourself.
It all goes back to what is required for you and your family to feel safe and secure in your home and what is your tolerance of the risk of burglary.
Minimum (if you don’t do this, why bother?):
- Entry sensors for all doors (nearly 3/4 of burglars enter through a door)
- Some form of audible alarm (may be provided by a control panel or a standalone siren) to scare away would-be burglars
Nice to have:
- Additional entry sensors on windows on the back and sides of the house on the ground floor
- Enough motion sensors to cover routes of entry that are not protected by sensors (such as second floor windows accessible via a ladder, one in a foyer may be sufficient)
- Glass break sensors to monitor entries that are shielded from neighbors that could be broken through without opening the door/window (such as sliding doors)
- Smoke alarms connected to your system
The “Cadillac” plan:
- A camera (a visual confirmation) is a great tool to know when to alert police and can also help catch the criminal and retrieve your valuables (see how much faster cops respond here)
- Carbon monoxide sensors
- Water sensors (toilets, water heaters, etc., especially in vacation homes)
- Home automation (lights, thermostat, garage doors, etc.)
Where do I put the sensors?
First, you always have to consider and test the range of the devices before permanently placing them. Most systems will have range extenders that can supplement the sensors that you purchase, if needed. If the sensors use your WiFi network, consider placement within range of your wireless router (re-orienting the antennas may help you get coverage in particular areas).
For systems that use a mesh network like Zigbee or Z-Wave, the more sensors the better. That’s because each sensor passes on messages to the edges of the network.
Additionally, sensors wired to power will also improve your network health since they nearly always act as repeaters to extend the range.
Also, note that the ground (think of your basement) is practically impenetrable by RF signals, so take care that there is a clear path back to your controller or router and be aware that directly under the controller might be a bad idea.
Why, you ask?

Mmm, delicious.
Did I lose you?
It turns out that the types of antennas that can be made into the circuit cards in the controller or base station have a pattern that looks very similar to this one. Just pretend that the controller is at the center, the doughnut hole, if you will. As a result, the reception above and below the device will be pretty poor.
That’s why some wireless routers come with antennas that you can change the orientation of to improve reception.
So, keep that in mind when choosing a location for your hub.
Also, don’t put sensors or receivers too close to other high power RF equipment or noise sources. The interference could cause issues trying to connect to the controller.
An intermittent connection caused by electromagnetic interference can be worse than no connection if it constantly triggers false alarms, and you turn it off just to make it stop. That’s why proper configuration and placement of sensors during your security system installation is critical.
Interference sources could include other sensors, radios, wireless routers, generators, electric motors, and even fluorescent lights and will depend on the operating frequencies of the system your are installing.
Here are some ideas specific to each sensor:
- Control panel – Put it somewhere that isn’t visible from outside your home, but near the entry that gets used the most, in a central location (if it connects wirelessly to the other sensors, most do)
- Base station (some systems) – In some alarm systems, this is the actual “brains” of the system and handles the alerts. You want to hide this somewhere that a criminal won’t be able to locate and destroy it.
- Entry sensors – Generally at the top or upper sides of or doors or the sliding parts of doors and windows. Don’t forget extra window sensors if you like to keep your windows cracked (6 in. or so to deter anyone but anorexic criminals) in the spring and fall.
- Alarm – Place this in a place where it will be heard. It should also be tough to get to and disable. You could mount it up high in a foyer or even in an attic if there is some sort of vent to let the sound escape and wake up your neighbors.
- Motion or infrared sensors – As I mentioned earlier, place these where they will catch a thief that slipped by the other entry sensors.
- Glass break sensors – This depends on the type. If they are contact sensors, you will need one on each pane of glass that you intend to protect. If they are audible sensors, then they will generally cover an entire room in most houses.
- Smoke alarms – Just replace your existing units
- Carbon monoxide sensors – Put the first on the floor that you sleep on. At least one on every floor and in every bedroom is ideal.
- Water sensors – This is a bit of a no-brainer, but the things that usually fail are sump pumps, hot water heaters, dishwashers, cracked pipes near the exterior of the house (unoccupied) and toilets. Where you put these will depend on whether or not the house is occupied (unless you believe spirits wash dishes).
- External infrared sensors – Near the end of your driveway, but far enough away to avoid false alarms
- Cameras – covering approaches to your house or areas that get high traffic in the home (foyers, hallways)
How to Install DIY Security System Sensors
This will vary depending on your system, but they may
- stick on
- attach with drywall anchors that you hammer in and screws
- glue on (yikes!)
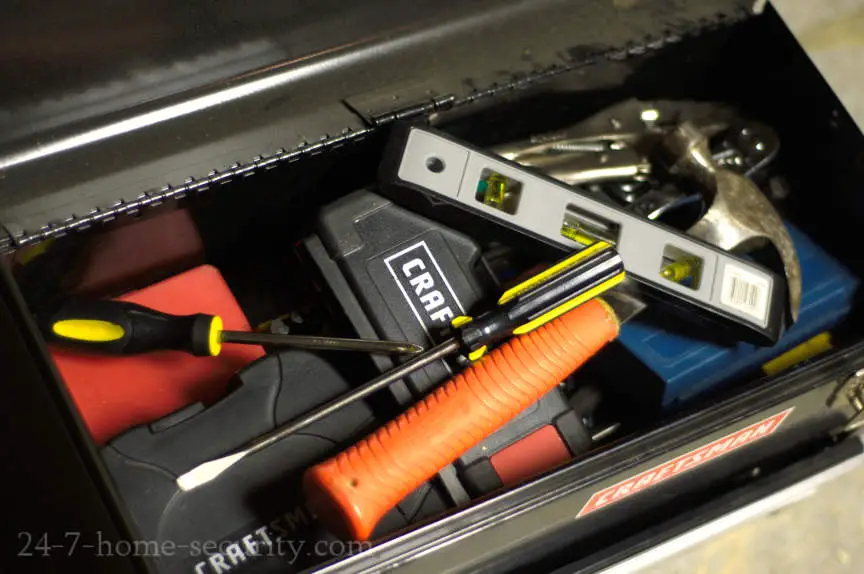
Tools required: Hammer, screwdriver, drill, drill bits, and a ladder or step stool, at most
This video from SimpliSafe does a good job of showing you how easy this can be.
DIY Security Systems with Installation Support
The level of effort for DIY security system installations can vary depending on how easy the system is to set up and what level of support from the company you can expect. Some companies will talk you through the whole process on the phone and with others you may have to rely on the included instructions or information on their website to complete the process. The table below summarizes the support advertised by each company.
DIY Security System Monitoring
I’ve covered security system monitoring in detail elsewhere, but we’ll go through the basics for convenience so that you understand your role with a DIY monitored system.
alarm monitoring and response
- A sensor activates the alarm panel or hub. The panel immediately contacts the alarm company or waits for a programmed delay (to allow you time to disarm it).
- The alarm monitoring center matches the alarm to your personal information about the property, including contact numbers.
- When an operator is available, they see the alarm and account information on their workstation display.
- The monitoring center operator follows the on screen instructions and his training to respond to the alarm. Usually a) the operator calls the residence (or contact via the alarm panel) to see if there is an emergency and b) reviews audio and video sensors for additional evidence to indicate a burglary in progress.
- Try additional contact numbers until someone can be reached or a pre-set number of failed attempts is made.
- Notify the police department that there is an alarm at the property, along with any alarm permit information that may be required, and information about which alarm sensors have been activated.
- An officer will be dispatched to check on the property (could be as hands-off as driving by depending on staffing, call volume, and the circumstances of the call).
Of course, your mileage may vary slightly depending on your particular alarm company.
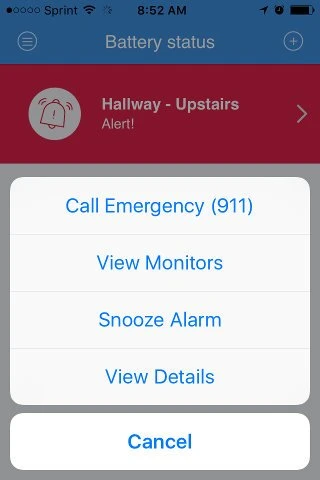
With a DIY monitored setup, you become the first notification point, potentially eliminating several steps that cause delay. The catch is, you need to be available to answer the alert ALL THE TIME.
What are the “alarm response times” that alarm monitoring companies talk about?
Usually, the “alarm response time” that they give you covers steps 2-5 in the list above. In other words, the part of the process that is under their control (from the moment they get an incoming alert to the time that they contact the authorities). The Frontpoint blog has an entry that discusses this in detail too.
In other words, they aren’t going to (and can’t) tell you the actual “alarm response time” that you care about, the time from someone kicking in your door to a patrol car showing up in front of your house.
Let’s break down the alarm response process and understand the typical time frames.
How long does it take a home alarm panel to contact the monitoring center?
Brass tacks: 10 seconds to 1 minute, up to NEVER
The skinny:
It depends, usually under a minute to give you time to disarm the system when you arrive home.
How long does it take the alarm monitoring center to contact police?
Brass tacks: 10 seconds to several minutes, up to NEVER
The skinny:
The average response times should be under a minute. Laws in some jurisdictions may prevent reporting if you can’t be contacted or you don’t have a permit for your alarm.
How long does it take the police to respond to a home security system alarm?
Brass tacks: 5 minutes to NEVER
The skinny:
Up to 98% of alarm reports are false alarms and police departments have limited resources to commit to alarm responses (according to US Department of Justice data). That problem is exacerbated by the recent reduction in the cost of alarm systems and resulting installation rates. If you happen to live in one of those jurisdictions, the local police department may have altered their response process to make the most of the resources that they have.
Unfortunately, that may include not checking on your house.
This release about the Detroit policy says the department won’t respond unless:
- Someone visually verifies a crime has been committed
- A break-in or crime is verified via audio or video
- The alarm company reports multiple alarm trips from at least two sensors at the property
This is where a camera can come in really handy. A burglary in progress call from a homeowner WILL GET a faster response than an alarm call from a monitoring center with no visual confirmation.
Now, You’re Ready to Take Action
Just remember to start with the most common points of entry and then add capability from there to reduce your risk.
Don’t know where burglars will try to get in, take a look at our review of criminology research to determine how to prioritize your security efforts.
Following these instructions does not guarantee that you will avoid a break in in your home or that your system will work as designed. There are enough variations in homes and installations that one set of instructions will never work for everyone. You will have to use these instructions, instructions from your manufacturer, and your noodle (AKA, your brain) to figure out what will work well in your specific situation.Some Lawyer
If this article helped you out or you have some additional tips to share with the next person in your shoes, share it on Facebook or Twitter with the buttons below or add your comments at the bottom of the article.
You can also follow us on our various networks (top of the page) to hear about new articles and tools as we make them available.
Your friends will like this more than a political rant
Hopefully, this gives you a pretty good idea of what sensors you want to have and what will be involved in a DIY security system installation.
If you still haven’t decided what system to use, take a look at our comparison page. We have DIY and full service options listed that you can filter and sort based on the criteria you think are important.

Hi, I’m Jody. I graduated with honors with a Masters of Science in Computer Engineering and have over 15 years of experience working as an engineer with electronics products. I’m a lifelong learner and tinkerer and enjoy automating things around the house so I can solve bigger problems than getting out of bed to check if the garage door is closed . . . like too little sleep!