If you're anything like me, you like the idea of security lighting but don't love the look of installing under eave house lighting all around your home.
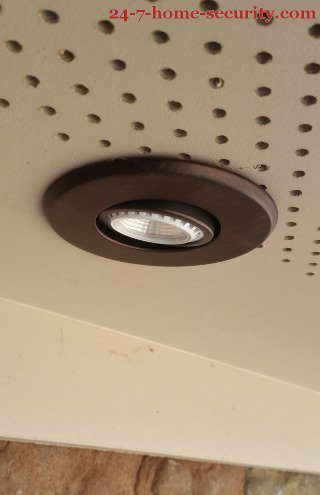
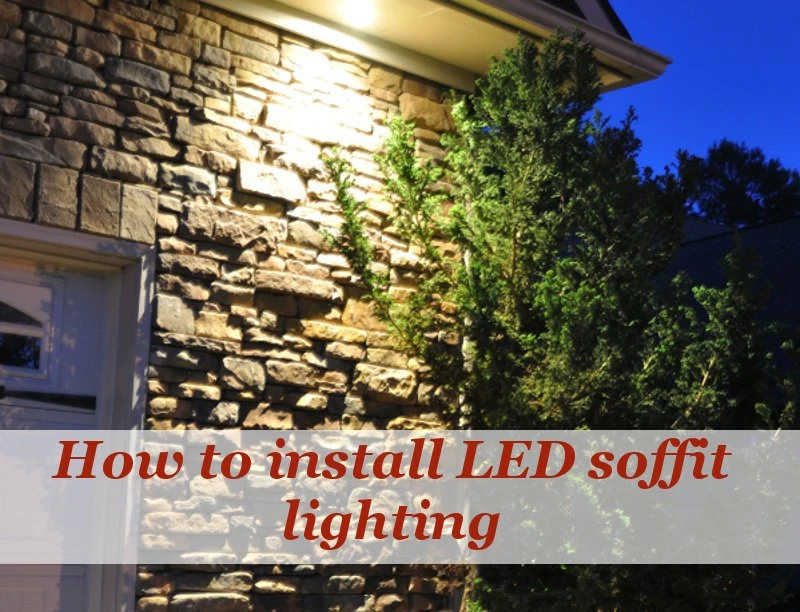
Instead, I opted for recessed soffit lights under the eaves for a clean and unobtrusive installation as a source of security lighting.
Soffit provides the architectural structure of your roofing system or balcony and at the same time protect and cover your rafters from several weather conditions and mold buildup.
And, as a bonus, the LED bulbs only use 5.5 Watts a piece. So, even if I leave them on all night (which I decided to do), they only use 0.044 kWh/day. At a cost of $0.12/kWh, that's a total yearly cost of $1.92.
I think I can work that into the budget for a really upscale look and some added security! Since I already had the wire laying around, this was a $60 project for me based off of these lighting fixtures that I bought off of Amazon.
Here's what we'll cover:
- Why bother with security lighting?
- Some Features to Consider for LED Soffit Lighting
- What you need to install lights under your eaves
- How to install recessed lights under your eaves
- Finding a circuit to install your lights into
- The best way to connect your new lights to a physical switch
- Want an easier way than a physical switch? Use a smart switch!
- Wiring in your lights and running wire to your lights
- Installing a daylight sensor
- How to install your new recessed light fixtures
- Choosing and installing your new LED bulbs
Why bother with under eave house lighting?
In a study conducted at UNC Charlotte Department of Criminology surveying convicted criminals, lights were about 25% effective as a deterrent for burglars. That may not sound like much, but for a few dollars a year, I'll take it.
Plus, it makes getting into and out of the house at night easier for everyone. And, they look nice too!
Some Features to Consider for LED Soffit Lighting
Water Resistance
Angled/ Sloped Soffits
If you plan to install vaulted soffits, it is highly recommended to consider recessed fixtures with an adjustable face. Most people like angled soffits for flexibility, and that’s what we recommend. But, you can also go for a recessed fixture with a 120-degree wide light beam angle which is ideal to use in vaulted or sloped areas.
Switching and Dimming
If you are installing multiple soffit lights around your home, you may want to control them all using a single switch or dimmers. However, using multiple incandescent lights (that are easy to dim) can put a lot of load on a single switch. This is why LEDs become an advantage to use for soffit lighting since they consume lower power and gives better performance for multiple fixtures.
To accomplish dimming, each soffit light requires a dedicated driver. This becomes a challenge when multiple lights are connected to a single driver. To solve this, you can put all the light drivers inside a large junction box and use extension cables to connect remote lights in various locations. When following this method, make sure that the junction box and work is up to your local electrical code, and that the fixtures wires are matched with the correct driver.
Color Changing
IC Rating
Compared to incandescent lights, LEDs generally produce less heat which will not require you to add a barrier between the lights and insulation. It is very important to check if the soffit lights installed in direct contact with insulation are IC rated for safety purposes.
What you need to install under eave lighting (leds)
So what's involved?
Thankfully, this project is pretty easy if you're comfortable working with electricity. Be sure to check your local building codes (most just reference the NEC codes) to make sure you're complying with all of the local regulations.
Here what you'll need:
- the light housing (these Globe Electric lights from Amazon worked out great and are under $10 each!)
- LED bulbs ($15 for 6 bulbs, leaving me 2 spares)
- wire (mostly 14/2 Romex with a bit of 14/3 for me)
- and an optional photo sensor (also called a dusk to dawn sensors, light sensors, and photodetectors, $6 at Amazon) and an electrical box
How to install recessed lights under your eaves
Now that you've got your shopping list, let's go over the steps on how to fit soffit lights under your eaves.
- Find a circuit to connect your new lights to
- Turn the breaker off, connect in the new wiring, and run it to the new locations for your lights
- Install the light housings under the eaves and connect the wires
- Put the new bulbs in, turn the breaker back on, and test your soffit lights
Now let's go over each of these in a little more detail.
Finding a circuit to install your lights into
First, you'll need to find a nearby circuit that you'll use to power your soffit lights (and make sure it has extra capacity for your new lights). For the LED bulbs like the ones I'm using, you can use 4 of them since it utilize less power than an incandescent bulb, so most circuits will do.
Next, find a place that you can connect your new wiring to run to your lights. An existing electrical box would be ideal so that you can avoid installing a new box. This is a good time to decide if you want to put the lights on a switch or just use a dusk to dawn sensor to turn the lights on when it's dark.
I decided to use a light sensor to turn my soffit lights on at night, so I needed a power source that was always on and wouldn't be turned off with a switch. Thankfully, I found exactly that after a couple of minutes in my attic. My plan was to first install the photosensor and use it to switch the power to my soffit lights.
The best way to connect your new lights to a physical switch
If you want to manually turn your soffit lights on and off at night, you have four options:
- tie into a switch that controls existing porch or flood lights (easy)
- buy a double switch that fits into a single gang form factor in an existing box (not bad)
- install a new box and switch (not fun)
- install a larger box where you already have light switches (really not fun!)
The downside is that anything but the top option requires running new wire down the wall to a box. It's not terribly difficult, but it will likely add an hour to your project.
If you're considering going that route, think about just tying your new soffit lights into an existing porch light or flood light that is controlled with a switch inside. It will be significantly easier than tearing out an old box and adding a new switch.
Want an easier way than a physical switch? Use a smart switch!
Just install a smart switch like the Aeotec Micro Switch to control your new lights using your home automation hub. We have a detailed review that also covers the installation of the Aeotec Micro Switch.
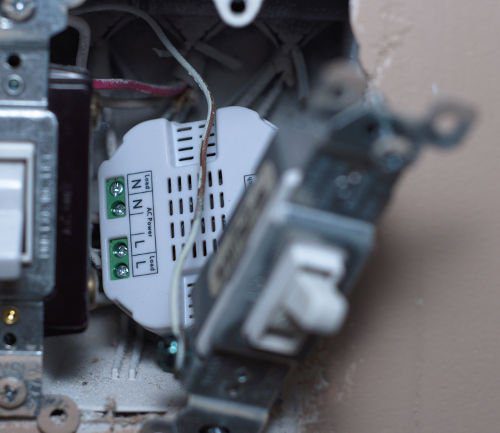
Then, you'll have the option of setting them on a timer, using sunset and sunrise to turn them on and off, or manually controlling them too.
Don't have a home automation system?
The technology has come a long way, and it's accessible for all kinds of people. Check out our home automation system comparison page for cost, features, and reviews of the most popular systems, all in one place.
Wiring in your lights and running wire to your lights
Now that you know where you're going to connect your soffit light, go ahead and lay out the wire that you'll need and be sure to leave several feet of extra wire at the end of the runs so that it's easy to strip back and wire in. It's easier to have a little extra wire at the lights so that you can pull them out and wire them in easily before installing the new light fixtures.
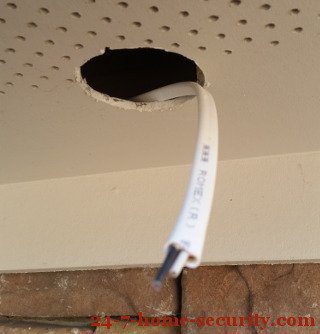
This is where the directions may diverge a little, depending on your plan. For me, it was a simple color match to connect the line wire and the neutral to my new photosensor. From there, the red (switched power) goes to the light as the line wire and the neutral continues on to also carry power.
Don't forget to secure your new wire with staples in keeping with your local regulations.
I was fortunate to have attic access to my eaves so that I didn't have to get too creative routing wires to my new light locations. Some of you may have to run the wire down the eave itself depending on your situation.
Installing a Daylight Sensor
How to install your new recessed light fixtures
Now that the wiring is in place, the light fixture installation will feel like the easiest part of the project. For the LED lights that I bought, I just had to drill a 3" hole to install the lights into. The trickiest part was avoiding the joists in the eave. Once the hole is drilled reach in and grab your wire and pull it out to attach the new light fixture.
I had to resort to a coat hanger to grab one of the wires that wasn't quite close enough to the hole.
At the lights, wiring them in is as easy as connecting the white, black, and ground wires to each other.
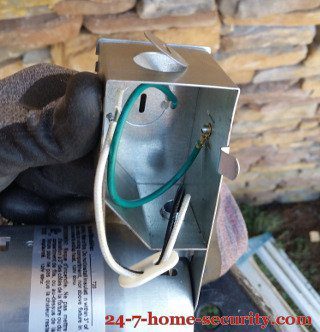
Then, close up the fixture and secure it in the eave using the built-in clips. The lights I used made this really easy for existing work without any need to nail or screw in the fixture.
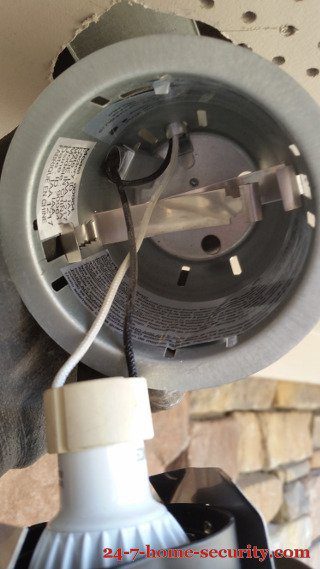
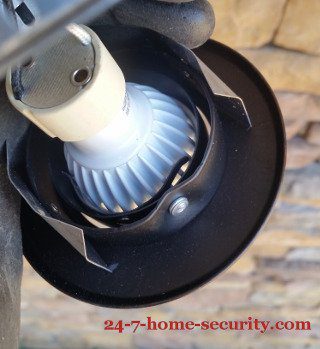
The lights that I purchased let you adjust the aim of the light after installation. So, I just waited for the evening and then went around adjusting how far down the wall the light shines for the effect I wanted.
Choosing and installing your new LED bulbs
When you're deciding on the best bulbs for your new recessed lights, you'll have a few primary considerations.
First, what color lights do you want? I chose warm white bulbs because we like the look better than the cooler daylight bulbs.
Next, you need to choose the angle of the light cast by the bulbs. Do you have a wide, open wall to cover with the soffit light or do you want the light to shine further down the wall? You can control this with the distance away from the wall, the angle of the bulb, and the angular range of the light coming from the bulb.
I chose a 40 degree bulb (https://amzn.to/2JJYTzJ) and like the way it turned out.
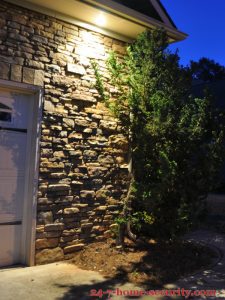
Here's a shot of the light cast by the bulb:
Finally, decide the light output that you want. If you have a two story home and would like the light to shine down and cover the ground, you'll need a stronger light than someone with a single story ranch style home.
To use the bulbs in these lights, it's as easy as pulling the cover off of the light fixture and installing your new bulbs before replacing the cover.
Now, all you have to do is adjust the aim of the lights to get the coverage that you want. I used a golf club to avoid carrying the ladder around once the lights came on in the evening, and it worked pretty well.
Now, just snap a few photos of your handiwork and enjoy your new soffit lights! If you found this article helpful, consider purchasing your new hardware using one of the links above to support the creation of more how to articles like this one.
Not sold on recessed soffit lights yet? You can consider a motion sensor installation for your current lights instead.

Hi, I’m Jody. I graduated with honors with a Masters of Science in Computer Engineering and have over 15 years of experience working as an engineer with electronics products. I’m a lifelong learner and tinkerer and enjoy automating things around the house so I can solve bigger problems than getting out of bed to check if the garage door is closed . . . like too little sleep!
OMG…you made this sound so simple! I would love lights around my house under the eaves…I currently have a 100ft strand of lights across the back of my house that are a pain. I always have a bulb out or the sun/rain destroy the gutter clips and they fall down. Where do you live? Can you come install these beautiful lights at my house?
sorry, not in that business!