Summer can be devastatingly hot while winter can be so freezing, forcing you to run your heater constantly and drying your skin and sinuses. Don’t fret - you can automate your indoor climate and improve air quality by wiring your humidifier to an Ecobee thermostat.
This DIY wiring might sound technically intimidating, especially since you need to figure out what hardware to use. Everything depends on your setup and it can be a headache. But once you are able to figure things out (and with a little hard work), you’ll love the results.
Here’s our Ecobee humidifier wiring guide to help you get started.
Why choose Ecobee to control humidifiers?
The Ecobee thermostat is one of the most trusted brands in the market today. Depending on the model, you’ll get almost everything you need to regulate your home temperature and save energy costs.
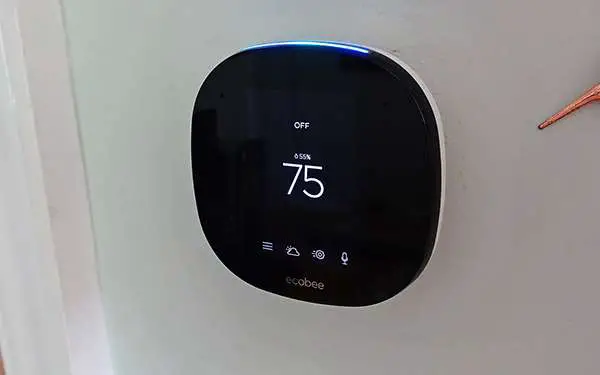
The most basic model has built-in sensors to monitor temperature and humidity. If you get the latest Ecobee versions, you’ll get advanced features such as smart home connectivity, voice command, schedule assistant through an app, and geofencing feature to name a few.
And if you’re a fan of smart home automation, then expanding your ecosystem wouldn’t be an issue since the Ecobee is compatible with a lot of third-party devices.
On the downside, not all models of Ecobee can be used to control a humidifier. So before you get your hands dirty, make sure that your Ecobee version can be connected to your humidifier without an issue.
What Ecobee versions work with humidifiers?
The manufacturer of Ecobee has made several updates over the years to cater to the varying needs of customers.
As you can see, the Ecobee thermostat comes in different models and functionalities. Unfortunately, the older models have limited features and can’t be used to control a humidifier.
So if you plan to set up a humidifier with an Ecobee thermostat, make sure that you get the Ecobee 3, Ecobee 4, or Ecobee 5 which are all the latest versions.
Unfortunately, the Ecobee 3 Lite doesn’t have an ACC terminal which is commonly used to control a humidifier, as well as a dehumidifier and ventilator. The good thing about the Ecobee 3 Lite is its high compatibility with other devices.
What humidifiers work with Ecobee?
Almost all kinds of evaporative humidifiers work well with Ecobee. These humidifiers have an electronically controlled valve, a water panel where air can flow, and a water connection. You can regulate the humidity level in your home by turning the water valve on and off. Controlling the water valve depends on your setup.
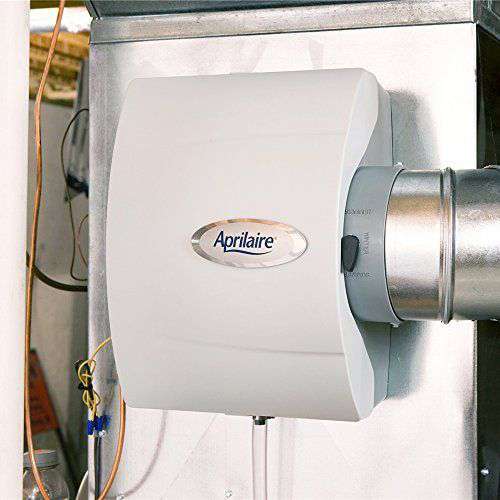
Since the latest versions of Ecobee have a built-in humidifier controller, it’s recommended that you get a humidifier with no automatic controller. One good example is the AprilAire 600M which would only cost you around $150. We think this manual humidifier is worth mentioning because of its good reputation plus it’s a well-known brand in the market when it comes to humidifiers.
EcoBee Humidifier Wiring Tools
The supplies you’ll need may vary on your setup. In this post, we’ll use the Ecobee 3 lite and the AprilAire 600M humidifier. You’ll need the following materials and tools:
- Relay - We suggest the Functional Devices RIB24C-FA since it’s perfectly compatible with AprilAire (in fact, it’s the same relay used for the model).
- Hose clamps - This should be enough to clamp the 1/2-inch drain line to the drain plug of the humidifier
- Pex valve - The type of valve will depend on how you’ll supply water to your humidifier.
- Sheet metal screws
- Aluminum duct tape
- 1/4-inch water supply line - A.k.a ice maker installation kit. Make sure to choose the one with brass fittings.
- 1/2-inch drain tube
- 6-inch ductwork and fitting - Make sure to choose the one that’s appropriate for your setup
- Material for mounting the transformer and relay
- Small wire nuts
- 14-gauge and 18-gauge electrical wires
- Angled sheet metal cutters
- Pliers or wrench
- Pipe cutters
- Power screwdriver
- Thick and heavy-duty gloves
Steps for EcoBee Humidifier Wiring
Step 1: Plan the layout
Step 2: Physical Installation
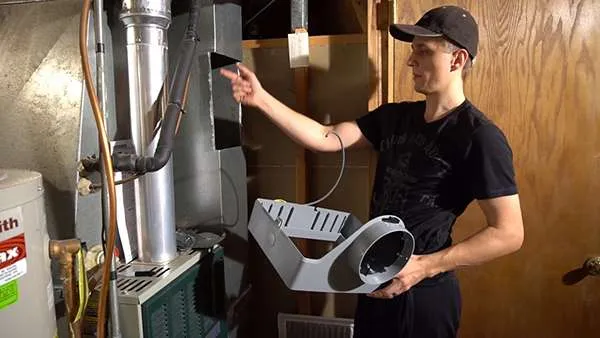
Once you have everything set, you can start the installation by cutting a hole in your ductwork. To do this, use the template that comes with the unit. Then follow the instructions of the unit to fix the mounting frame in place.
The next step is cutting the hole for the air line. Use the 6-inch mounting collar as your template. Using the sheet metal screws, mount the collar and connect to the air duct. Cover the seams with tape.
Then, turn off the water supply. Install the valve to the water line by cutting the pex (use the right pipe cutter to do this). No need to worry about soldering or using adhesive material for this step since valves generally use compression fittings.
Step 3: Start the wiring
Before you start wiring, make sure that your HVAC is turned off.
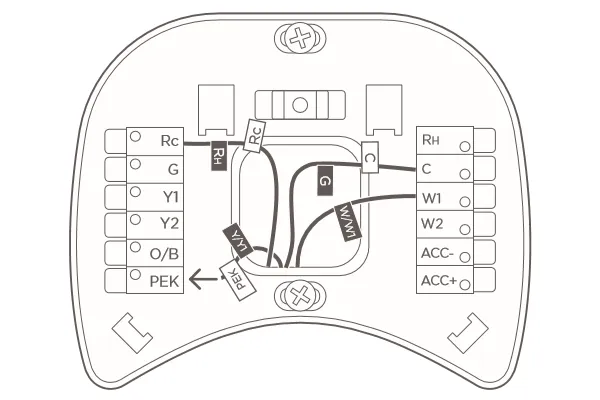
There are many ways to wire your humidifier to the Ecobee thermostat and for some people, this step can be confusing (check the diagrams and compare it to the wirings inside your furnace and at the back of your thermostat)!
Using the diagrams that come with your unit, locate the wires that connect the fan and the water valve. Make sure that the wires (RC, G, Y1, and W1) are correctly wired according to the version of your Ecobee.
Install the transformer and relay inside your furnace. The transformer is necessary since the humidifier needs a 24V supply to control the water valve.
Once you’ve put everything in place, start the wiring (make sure to check the diagram of the unit when wiring).
Once everything is correctly wired (make sure to triple check that the wires are correctly connected), turn on the power!
Step 4: Configure the Ecobee
Now you can configure the Ecobee to control the humidifier. On the Ecobee app, click the menu and go to installation settings.
Select the equipment icon and click the humidifier. Then specify the type of humidifier you’re using. There are two types of humidifiers - the evaporative and steam humidifier. In this guide, we’ve chosen the evaporative humidifier (AprilAire 600M).
Finally, change the humidity set points according to your preferences. This is optional if you want to achieve the maximum comfort level. Simply go back to the main menu and click the Ecobee system icon. Choose the humidifier and press ‘on’ to change the humidity points.
And you’re done! Your humidifier can now smoothly communicate with your Ecobee.
Summary
Automating your humidifiers with Ecobee thermostats can save you from dried skin and clogged noses during the winter season.
Wiring your humidifier with the Ecobee thermostat can be a little time demanding but worth it. You’ll realize that connecting the valve to the Ecobee is actually straightforward (make sure you understand the diagram that comes with the unit). And finally, you can ditch your old humidifiers and have your climate inside the house fully automated.
Hi, I’m Christy, and I’m an electronics engineer by profession. I have taught in a university for 2 years while pursuing my master’s degree in cognitive radio and worked for a company to develop wireless medical devices. Currently, I’m doing research for a doctorate degree in engineering using a wireless sensor network for smart agriculture. I’ve been active in our local IoT community, IoT Cebu, where I participate in conducting talks about Arduino, Raspberry Pi, and DIY home automation using Wi-Fi and ZigBee devices.