In the age of in-home personal digital assistants like Google Home and Amazon Alexa, I thought it would be fun to take a look at how simple solutions can cheaply and effectively solve problems around the house.
So, let's take a look at how you can make an improvised water sensor or diy water alarm using materials you may already have around the house.
Why Bother with a DIY Flood Sensor?
Water damage in a home is one of the quickest and most common ways to incur damage in a home. In fact, a study conducted by Traveler's Insurance in North Carolina, excluding catastrophic events, concluded that "damage caused by water accounted for 28 percent of its property claims in the state, compared to three percent for fire."
That's nearly 10x more!
Combine the likelihood of water damage in your home with the expense of repairs, and you've got a real problem that deserves a solution.
Want to skip all of the work?
Check out these commercial solutions if you're willing to trade money for time:
| Sensor | Protocol | Cost | Rating |
|---|---|---|---|
| Samsung SmartThings Water Sensor (https://amzn.to/2JDmDFR) | Zigbee | $38 | 4.0/5 |
| Aeotec Water Sensor 6 (https://amzn.to/2r8zckz) | Z-Wave Plus | $60 | 4.2/5 |
| Centralite Water Leak Sensor (https://amzn.to/2JB5wEA) | Zigbee | $35 | 3.8/5 |
And while there are good water sensors that will integrate with a home automation hub, this article will let you design one that has no such requirement (though it's possible...hint: read through the last section).
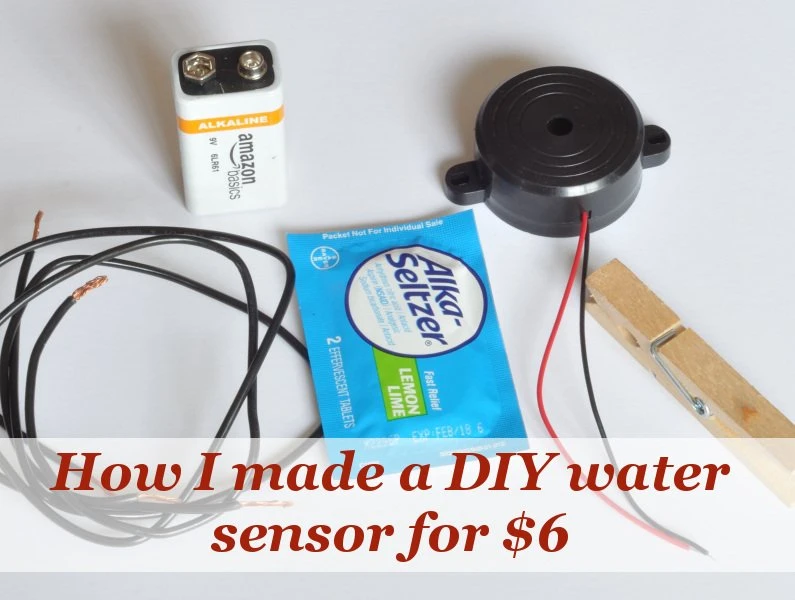
What you need to build your DIY water sensor
Here's what you need to get started:
- a clothes pin
- a short length of wire (braided would be best, small gauge like 20 AWG would be fine)
- a battery
- a buzzer
- an Alkaseltzer tablet
- electrical tape
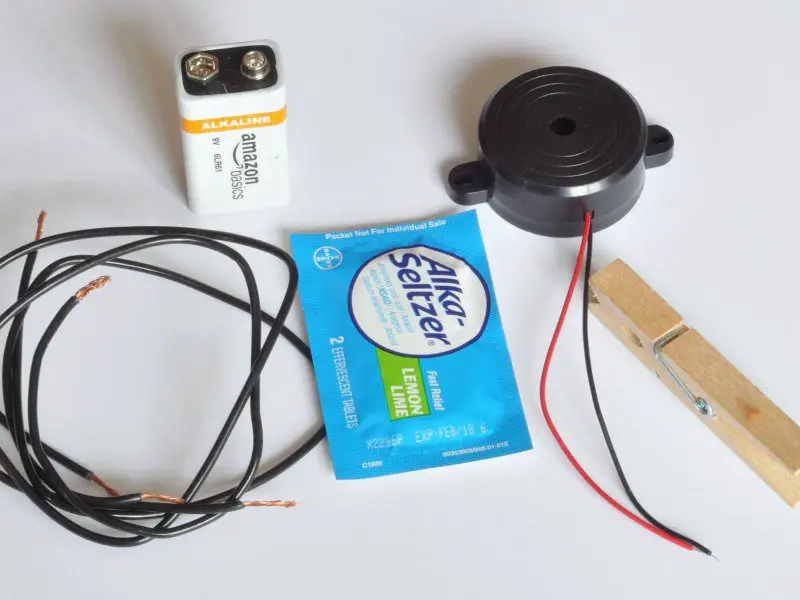
That's it! many of you will have the first few, and you can pick up one of these buzzers on Amazon and have it in a couple of days to complete your list.
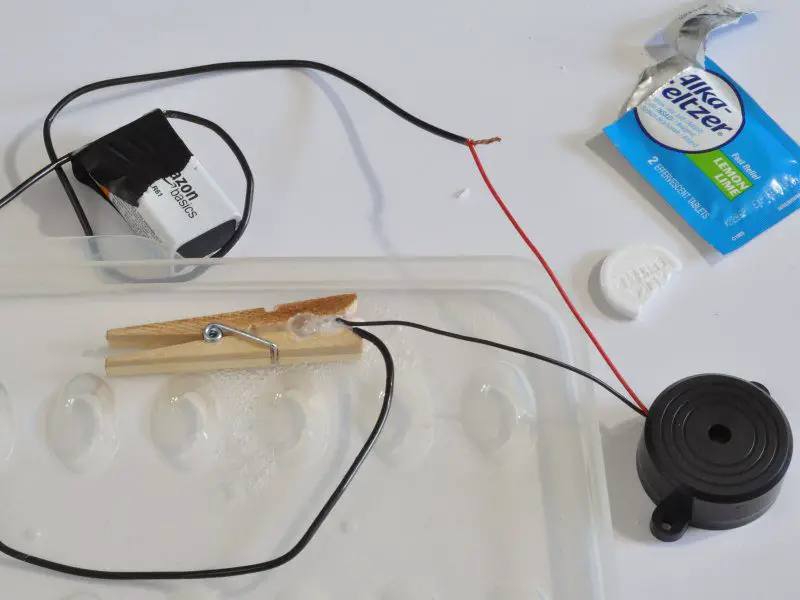
How to build your DIY flood sensor
Once you have everything you need, building the water sensor will be a piece of cake. Here's what you do:
- Strip the covering from the end of two pieces of wire
- Spread the wire out on the inside surface of the clothes pin and place a piece of the Alka Seltzer tablet in between the wires
- Connect the other end of one wire to the buzzer
- Connect the other end of the other wire to the negative terminal of the battery
- Now, connect the other lead of the buzzer to the positive terminal of the battery
That's it! To test your setup, just remove the tablet and make sure the buzzer goes off once the two sides connect.
Now, all you have to do is relocate your new sensor to a spot you want to monitor.
Here are a few places to consider:
- Under your sinks or garbage disposals
- Near a toilet
- Under a hot water heater
in the catch pan under your - HVAC evaporator drip pan
- Near a sump pump in your basement
- To monitor your washing machine hoses
In any of these locations, the difference between hours of flooding before you notice versus an immediate alarm could save you thousands of dollars.
Speaking of which, let's talk about shortening that response time (and the cleanup bill) when you're away at work or out of town right after a quick test of our new sensor.
How to connect your flood sensor to your phone
Just in case you spend a lot of time away from home on travel or do have a second home, I wanted to give you an option for connecting your new water sensor so that you get an alarm on your phone.
If you have a home automation hub already and want to connect to it, your shopping list will look like this:
- a clothes pin
- a short length of wire (braided would be best, small gauge like 24 AWG would be fine)
- a door sensor with external inputs (like this Ecolink unit that I've used before)
- an Alkaseltzer tablet
Here's how it works:
For increased versatility, some door and window sensors also have terminals that let you connect external sensors. The RS100HC is one popular example. You can compare it to others on Amazon. It's the same one that I used to connect my doorbell to my home automation system.
You'll simply pop off the cover and connect your new sensor as the external input for the door sensor. That way, when the clothes pin is closed when the Alkaseltzer dissolves, the sensor will send a notification to your home automation hub to say the sensor is closed.
From there, it's your choice whether you
- flash the lights
- set off a siren
- send a push notification to your phone so that you can get in touch with family or a neighbor to check on your house
Did you find this article helpful? The links to Amazon are how I keep my servers running and buy new electronics to experiment with. If you're doing this build, consider supporting my work by using the links before you purchase at no cost to you.

Hi, I’m Jody. I graduated with honors with a Masters of Science in Computer Engineering and have over 15 years of experience working as an engineer with electronics products. I’m a lifelong learner and tinkerer and enjoy automating things around the house so I can solve bigger problems than getting out of bed to check if the garage door is closed . . . like too little sleep!